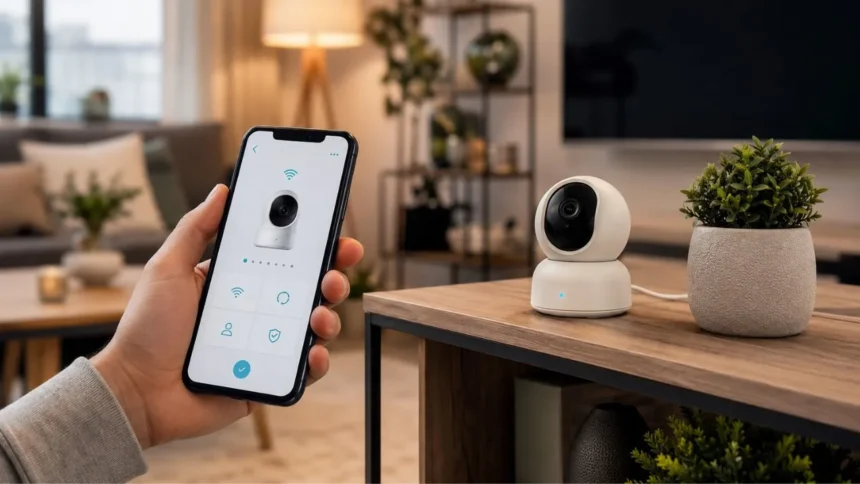
Setting up a Merkury Smart WiFi Camera is usually straightforward once you have the correct mobile app and wireless network. Most models require you to power on the camera, reset it into pairing mode, add it through the Geeni app, and show an in-app QR code to the camera lens. The entire process can often be completed without a separate smart home hub.
The most common setup problem is attempting to connect the camera to a 5 GHz WiFi network. Many Merkury and Geeni smart cameras require a password-protected 2.4 GHz network during installation. Incorrect WiFi passwords, weak signals, disabled phone permissions, and a camera that is not blinking correctly can also prevent successful pairing.
Merkury has sold several indoor, outdoor, fixed, pan-and-tilt, doorbell, and 1080p camera models. App screens, reset-button locations, indicator colours, storage limits, and available settings can differ between products. For that reason, the model number and instructions printed on your package should always take priority when they differ from general camera setup guidance.
This guide explains how to connect a Merkury camera to WiFi, scan the setup QR code, use the alternative WiFi pairing method, configure motion alerts, and troubleshoot an offline device. It also covers camera placement, recording options, privacy controls, account sharing, firmware updates, and important steps to take before relying on the camera for home monitoring.
Quick Answer: How Do I Connect My Merkury Camera?
Connect the Merkury camera to power and wait for it to start. Press and hold its reset button, or insert the supplied pin into the reset hole, until you hear a tone or voice prompt. The status light should begin blinking, indicating that the camera is ready to connect to your mobile application and wireless network.
Download the app named in the camera’s instructions. Many Merkury smart cameras use the Geeni app, while certain products may direct buyers to a Merkury Smart by Geeni application. Create an account, sign in, allow the permissions required for setup, and connect your phone to the home’s 2.4 GHz WiFi network.
Open the application, tap the plus sign or Add Device, and choose WiFi Camera or the closest camera category. Enter the password for your 2.4 GHz network and confirm that the camera’s indicator is blinking. The app should then display a QR code that contains the information needed to connect the camera.
Increase your phone’s screen brightness and hold the QR code approximately 6–8 inches from the camera lens. Move the phone slowly until the camera produces a confirmation sound. Confirm the prompt in the app, wait for pairing to finish, name the camera, and open its live view to test the connection.
What You Need Before Starting the Setup
Begin with the camera, its power cable, power adapter, mounting accessories, and reset pin if one was supplied. Check the package carefully because some cameras use a small reset hole that cannot be pressed comfortably with a finger. Do not mount the camera permanently until you have completed pairing and tested its live video.
You also need a smartphone or tablet with internet access and enough free storage to install the required app. Charge your phone before starting and temporarily disable aggressive battery-saving settings if they stop the app from running properly. Keeping the app open during pairing can prevent the process from being interrupted before the camera joins the network.
Prepare the exact name and password of your 2.4 GHz home WiFi network. Remember that the WiFi password is not necessarily the same as the password used to open your router’s settings. Passwords are case-sensitive, so an incorrect capital letter, space, number, or symbol can cause the connection to fail without clearly identifying the mistake.
Place the camera, phone, and router close together during the first setup. A location may appear to have adequate WiFi for a phone but still provide an unstable signal for a small smart camera. Once pairing is complete, you can move the camera gradually towards its intended location while checking whether the live view remains reliable.
Find the Correct App for Your Merkury Camera
Many Merkury Smart WiFi Cameras are managed through the Geeni app. The official setup process for these models normally involves creating a Geeni account, tapping Add Device, and selecting the WiFi camera category. The camera then receives your network details through QR-code pairing or an alternative WiFi setup mode.
Certain Merkury products may use the Merkury Smart by Geeni app or a model-specific setup process. Do not choose an application based only on a similar logo or product name in an app store. Check the quick-start guide, scan the setup code printed in the manual, or search using the exact camera model number shown on its label.
Download the application only from the recognised Apple App Store or Google Play Store. Confirm that its publisher and branding match the information supplied by Merkury or Geeni. Avoid unofficial camera applications that request unusual permissions, payment details, or account information before you have verified that they support your exact device.
When you already have one of the apps installed, update it before attempting to add the camera. An outdated application may display different pairing screens or fail to recognise newer device firmware. If your camera was previously linked through another account, remove it from that account or perform a complete reset before attempting to register it again.
Connect Your Phone to a 2.4 GHz WiFi Network
Most Merkury and Geeni smart cameras require 2.4 GHz WiFi during setup. This wireless band generally offers a longer range through walls than 5 GHz, making it suitable for connected household devices. However, many modern routers combine both frequencies under one network name, making it difficult to see which band your phone is currently using.
Open the WiFi settings on your phone and look for a network name that includes terms such as 2.4G, 2G, or 2.4 GHz. Connect to that network and enter its password before opening the camera app. If your router displays separate 2.4 GHz and 5 GHz names, avoid the one marked 5G during the initial installation.
When both bands share one network name, the router may select the frequency automatically. This can still work, but unsuccessful pairing may require temporarily separating the bands through the router’s settings. Another option is to move farther from the router, where a phone may naturally connect through the longer-range 2.4 GHz signal.
Do not disable important router-security features randomly in an attempt to make the camera connect. First confirm the camera model, network password, signal strength, and 2.4 GHz availability. When router settings need to be changed, follow instructions from the router manufacturer and restore any temporary changes once the Merkury camera setup has been completed.
Power On and Reset the Merkury Smart Camera
Connect the camera using the supplied or manufacturer-approved power equipment. Wait while the device starts, which may involve an indicator light, rotating lens, voice message, or short chime. Some pan-and-tilt cameras perform a brief movement test during startup, so place the device on a stable surface where it cannot fall.
Locate the reset control on the back, bottom, base, cable, or side of the camera. Depending on the model, it may be a visible button or a small recessed hole. Press and hold it until you hear a confirmation tone or the status indicator changes, then release it and allow the device to enter pairing mode.
Many supported cameras display a solid red light before changing to a blinking red indicator. The exact light colour can vary, so concentrate on the behaviour described in your model’s manual. A rapidly blinking light usually indicates that the camera is ready for the main pairing process, while another blink pattern may represent an alternative connection mode.
If the indicator remains solid, unplug the camera for several seconds and reconnect it. Wait for startup to finish before holding the reset button again. Avoid repeatedly pressing the control for very short periods, because the device may not recognise the reset and can remain linked to old network information rather than entering pairing mode.
Add the Camera Through the Geeni App
Open the Geeni app and sign in to your account. Tap the plus sign in the upper area of the home screen or select Add Device, depending on the current app layout. Choose WiFi Camera, Smart Camera, or the camera category that most closely matches the name and picture of your Merkury device.
Confirm that the camera has power and that its status light is blinking as shown in the application. The app may ask for Bluetooth, local-network, nearby-device, camera, or location permission during setup. Allow the permissions required for discovery and pairing, because blocking them can prevent the application from communicating with the camera.
Select your 2.4 GHz WiFi network and enter the password carefully. Use the option to reveal the characters temporarily so you can check capital letters, spaces, and symbols. The camera will not receive your router’s administrative password; it needs the ordinary wireless password that phones and other household devices use to join the network.
Continue until the app displays its camera-pairing QR code. Do not take a screenshot or share this code because it may contain information used to connect the device. Keep the app open, increase the phone’s brightness, clean the camera lens, and prepare to hold the screen directly in front of the lens.
Scan the QR Code with the Camera Lens
Position the phone so the QR code faces the camera rather than pointing the camera at the back of the phone. Begin roughly 6–8 inches from the lens and keep the screen level. Hold both devices still for several seconds, giving the camera enough time to focus on and read the displayed pattern.
When the QR code is not recognised, increase the phone’s brightness and remove glare from nearby lights or windows. Clean fingerprints from the camera lens and phone screen, then slowly move the phone closer and farther away. Turning off dark mode or enlarging the app display may also make the pattern easier for some camera models to scan.
The camera should produce a beep, chime, or voice prompt after reading the code. Tap I Heard the Prompt, Next, or the equivalent confirmation inside the app. The camera will then use the provided information to join the WiFi network and register with your account, which may take up to a couple of minutes.
Do not unplug the camera, close the application, or switch your phone to another network while the progress screen is active. Once the connection succeeds, choose Done and give the camera a descriptive name. Names such as Front Room Camera or Pet Area Camera are more useful than leaving several devices with identical default names.
Use WiFi Mode When QR Pairing Does Not Work
Some users cannot complete QR-code pairing because the lens will not recognise the screen, the phone display is damaged, or the camera repeatedly fails during registration. Supported app versions may offer an alternative method called WiFi Mode. This option sends the network details without requiring the camera to scan the on-screen QR pattern.
Reset the camera again and confirm that its status light is blinking. In the Geeni setup screen, look near the top-right corner for the current pairing mode. Tap QR Code for Camera, QR Mode, or the displayed method, and change it to WiFi Mode when that option is available for your device.
Follow the instructions inside the app, confirm the blinking indicator, and enter the 2.4 GHz WiFi password. The application may communicate directly with the camera or ask the phone to join a temporary network created by the device. A network named with Merkury, Geeni, or a similar device label may appear during manual pairing.
Your phone may warn that the temporary camera network has no internet connection. This can be normal during setup because the network exists only to exchange pairing information. Remain connected as instructed, return to the camera app, and allow the device enough time to join the main home WiFi before assuming that the process has failed.
Test the Live View Before Mounting the Camera
After pairing, tap the camera tile on the app’s home screen to open its live video. Allow several seconds for the stream to load, particularly during the first connection. Confirm that the image is correctly oriented, reasonably clear, and responsive when someone moves through the monitored area.
Test the microphone and speaker when your model supports two-way audio. Stand in the room while another authorised person uses the app from a different location. Listen for excessive delay, feedback, or low volume, then move the camera away from televisions, speakers, fans, or other sources of continuous background noise.
Switch off the room lights to check automatic night vision. Infrared reflections from windows, mirrors, glossy walls, or objects positioned close to the lens can create a bright, cloudy image. Adjust the angle until the camera can see the important area clearly during both daylight and low-light conditions.
Keep the camera operating in the planned location for several hours before drilling holes or applying permanent adhesive. Check that the stream remains online and that notifications arrive consistently. When the signal becomes unreliable after moving the device, choose a position closer to the router or improve the home’s WiFi coverage.
Choose a Safe and Useful Camera Position
Position the camera where it can see the important area without capturing unnecessary private spaces. A high corner can provide broad coverage of an entrance or living room, while a lower shelf may give a better view of pets. Use the live feed to confirm the angle rather than estimating coverage from the camera’s physical direction alone.
Avoid pointing an indoor Merkury camera through a window to monitor an outdoor area. Glass can reflect infrared night-vision lights and make the image unusable after dark. Indoor models may also lack weather protection, so a properly rated outdoor camera is a safer option for driveways, gardens, porches, and external entrances.
Secure the power cable so children and pets cannot pull, chew, or become caught in it. Do not position the camera near sinks, showers, cooking steam, heaters, or unstable furniture. Leave enough ventilation around the power adapter and use a suitable outlet rather than creating a hazardous arrangement with damaged or overloaded extension leads.
Respect the privacy of everyone who enters the monitored space. Avoid bedrooms, bathrooms, changing areas, and locations where visitors reasonably expect privacy. Household members, carers, cleaners, tenants, and employees should understand when video or audio is being captured and who can access the live feed and recordings.
Configure Motion Detection and Phone Alerts
Open the camera’s live view and tap the settings icon or three-dot menu. Look for Detection Settings, Motion Detection, Notifications, or similar options. Enable motion alerts, select an available sensitivity level, and verify that the Geeni or Merkury application has permission to send notifications through your phone’s operating-system settings.
Begin with medium sensitivity rather than automatically choosing the highest level. Curtains, pets, shadows, television screens, fans, reflections, and changing daylight can trigger unnecessary alerts. Review several hours of activity and adjust the sensitivity gradually until the camera detects relevant movement without sending a notification for every minor change.
Some Merkury camera models offer activity zones, human detection, sound detection, tracking, or notification schedules. Availability varies by device, firmware, app version, and subscription. Use zones to focus on doors, corridors, furniture, or pet areas while excluding busy windows or screens that regularly create unwanted motion events.
Create quiet periods when alerts are unnecessary, but do not disable notifications so broadly that important events are missed. Test the finished settings by walking through the monitored area from several directions. Confirm that the alert reaches your phone and opens the correct camera rather than assuming that an enabled setting is working properly.
Set Up a MicroSD Card or Cloud Recording
Many Merkury cameras support an optional microSD card for video recording, but card capacity and recording behaviour vary by model. Switch off and unplug the camera before inserting a card unless your manual says otherwise. Place it in the correct orientation and push gently until it clicks securely into the slot.
Reconnect the camera, open its settings, and check whether the storage card is recognised. The app may offer continuous recording, motion-event recording, or both. Formatting may be required before use, and formatting normally deletes everything already stored on the card, so never insert a card containing important files without backing them up first.
Cloud recording may be available through an optional plan. Review the current price, trial period, recording length, retention period, supported features, and cancellation terms before subscribing. A plan may store event clips online even when the camera or local card is damaged, but it should not be assumed that every recording feature is included free.
Test playback after configuring either storage method. Create a motion event, wait for processing, and check that the clip can be found inside the app. Important footage should be saved promptly because memory cards can overwrite older recordings, cloud clips may expire, and camera access can be lost after a reset or account problem.
Rename and Organise the Camera in the App
A clear camera name makes alerts easier to understand, especially when several smart devices are linked to one account. Open the device, tap the three-dot settings menu, and look for Modify Device Name, Device Information, or a similar option. Choose a name based on the room or area rather than a generic number.
Assign the device to a home or room when the application provides organisational controls. This can make it easier to find the correct camera and may support smart-home voice integrations. Keep the naming style consistent, such as Kitchen Camera, Back Door Camera, and Pet Room Camera, instead of mixing several unrelated naming methods.
Review the device’s time zone and date display after setup. An incorrect account region or phone setting can cause recordings and alerts to show the wrong time, creating confusion during playback. Restart the app after making changes and create a test recording to confirm that the timestamp matches the actual local time.
Open the advanced settings page and check for firmware or device-version updates. Install legitimate updates while the camera has stable power and WiFi. Do not unplug it during an update, because interrupting firmware installation may leave the camera offline or require a complete reset and another pairing attempt.
Share the Merkury Camera with Family Members
Device sharing allows trusted household members to access a camera without everyone using one account password. The second person normally needs to create their own account in the supported Geeni or Merkury app. Open the profile or device-sharing section, choose the camera, and follow the prompts to invite the registered user.
Share access only with people who genuinely need it. Depending on the app and camera model, invited users may be able to view the live stream, use two-way audio, receive alerts, or change certain settings. Review the available permission details instead of assuming that a shared user receives limited read-only access.
Do not send your main account password through text messages or use one simple password across several family phones. Individual accounts make it easier to remove one person’s access later without changing every device. They also reduce the chance that an old, lost, or borrowed phone remains permanently signed in to the primary camera account.
Review shared users regularly and remove anyone who no longer lives in the property or requires monitoring access. Change the main password when you suspect it has been exposed. If two-factor authentication is available in the account settings, enable it and protect the connected email account with strong security as well.
Why Won’t My Merkury Camera Connect to WiFi?
The most likely causes are an incorrect WiFi password, a 5 GHz network, weak signal strength, or a camera that is not properly in pairing mode. Re-enter the password slowly, confirm that your phone is connected to 2.4 GHz WiFi, and reset the camera until its indicator matches the pattern shown in the app.
Move the phone and camera closer to the router and restart all three devices. Allow the router to reconnect fully before reopening the camera application. Temporarily disconnect unused household devices when the router has reached its connection limit, and check whether parental controls or MAC-address filtering are blocking new equipment.
Confirm that Bluetooth, location, nearby-device, local-network, and camera permissions are enabled where requested. The exact permissions differ between Android and iPhone, but refusing a required prompt may stop discovery or QR pairing. Reopen the app after changing permissions so it can restart the connection process with the new access.
Check whether the network name or password contains unusual characters that the camera may struggle to process. Avoid public WiFi, hotel sign-in networks, guest networks with isolation enabled, and enterprise connections requiring a web login. A normal password-protected home network is generally the most reliable environment for initial setup.
What to Do When the QR Code Will Not Scan
Start by cleaning both the camera lens and phone screen. Increase the display brightness to maximum and remove any screen setting that changes colour temperature or strongly dims white areas. Hold the phone parallel to the lens rather than tilting it, because reflections can make part of the QR pattern unreadable.
Begin at approximately 6–8 inches and move the phone slowly instead of rapidly waving it. Pause at several distances to let the camera focus. When the phone screen is unusually large or small, a slightly different distance may work better, so use the official range as a starting point rather than an unchangeable rule.
Reduce bright background light and avoid standing directly beneath a lamp that reflects from the screen. Rotate the camera away from windows during setup and return it to the intended position afterwards. Do not cover the QR code with fingers, notifications, accessibility controls, or floating phone menus while attempting to scan it.
When repeated attempts fail, reset the camera and begin again with a freshly generated code. Confirm that the correct WiFi password was entered before the QR screen appeared. Use the app’s alternative WiFi Mode when supported, or complete the process with another compatible phone if your current display is damaged.
How to Fix a Merkury Camera That Shows Offline
First confirm that the camera has power and that the router is connected to the internet. Look for an indicator light and test the outlet with another device. Restart the camera by disconnecting power briefly, reconnect it, and wait for the full startup process before checking its status in the application again.
Restart the router when several connected devices are also experiencing problems. If only the camera is offline, move it temporarily closer to the router to test signal strength. A camera placed at the edge of WiFi coverage may work during quiet periods but disconnect when interference or network traffic increases.
Open the device settings and check for firmware or device-version updates after it reconnects. Update the phone app as well, then sign out and back in if the device tile remains stale. Confirm that no recent router change altered the WiFi name, password, encryption method, or enabled band.
When the WiFi name or password has changed, the camera may need to be reset and added again. Do not delete the device immediately when local recordings are important, because resetting or removing it may affect access to stored footage. Save any available clips before performing a full factory reset.
How to Move the Camera to a New WiFi Network
A Merkury camera normally cannot follow a changed network name or password automatically. When you replace the router, move home, or update WiFi credentials, the camera may remain offline because it still remembers the previous network. The simplest solution is usually to reset it and repeat the original setup process.
Before resetting, check the application for a network-change option because capabilities differ between models. Download any recordings that you need, note existing motion settings, and take screenshots of important configuration pages. A factory reset can remove device information and require settings to be recreated after pairing.
Connect your phone to the new 2.4 GHz network, power the camera, and hold the reset button until the prompt sounds. Add it through the correct app, provide the new WiFi password, and complete QR or WiFi Mode pairing. Use the previous device name when you want alerts to remain easy to recognise.
Test live video, notifications, two-way audio, night vision, and recording after the change. Remove any duplicate offline camera tile only after confirming that the newly connected device works correctly. Review shared users and cloud-storage settings because some services may need to be reassigned to the re-added camera.
Protect the Privacy and Security of Your Camera
Create a long, unique account password that is not used for email, shopping, banking, or social media. A password manager can generate and store a strong credential without requiring you to memorise it. Never keep the manufacturer’s default credentials when a model provides them, and do not share the password unnecessarily.
Enable two-factor authentication when it is offered by the app or connected account. Secure the associated email account as well, because email access may allow someone to reset the camera password. Regularly review signed-in devices and shared users, then remove any phone or person that should no longer view the feed.
Keep the camera firmware, mobile app, phone operating system, and router software updated. Legitimate updates can correct security weaknesses and improve performance. Download apps only from recognised stores, avoid clicking unexpected account links, and never give a verification code or password to someone claiming to provide unsolicited camera support.
Place the camera openly and use privacy mode, physical lens covers, or disconnection when monitoring is unnecessary. Do not record sensitive documents, passwords, computer screens, neighbouring property, or highly private rooms. Before selling or giving the camera away, remove it from your account and complete the manufacturer’s factory-reset process.
Final Thoughts
To set up a Merkury Smart WiFi Camera, begin by confirming the model and downloading the correct application. Most standard cameras use the Geeni app, but your manual or package should provide the final answer. Connect your phone to 2.4 GHz WiFi and keep the camera near the router during installation.
Power the camera, hold its reset button until you hear a prompt, and confirm that the indicator light is blinking. Add a WiFi camera inside the application, enter the network password, and show the generated QR code to the camera lens. Wait for confirmation before naming and testing the device.
When QR pairing does not work, improve screen brightness, remove reflections, check the password, and reset the camera. Supported models may also provide WiFi Mode as an alternative. Weak signals, blocked permissions, unsupported networks, and old app versions are common reasons that a Merkury camera will not connect.
Once the camera is online, configure notifications, recording, privacy, sharing, and firmware updates before relying on it. Test the live feed in its final location and protect the account with strong security. A careful setup produces a more dependable camera and reduces unnecessary alerts, connection failures, and privacy risks.
Why is my Merkury camera blinking red?
A blinking red light commonly indicates that the camera is in pairing mode and ready to connect. Indicator behaviour can vary by model, so compare it with the pattern shown in your app or manual.
Does a Merkury camera work with 5 GHz WiFi?
Many Merkury and Geeni cameras require a 2.4 GHz network during setup and cannot connect directly to 5 GHz. Check your exact model because wireless compatibility can vary between products.
Which app do I use for my Merkury camera?
Many models use the Geeni app, while certain products may use Merkury Smart by Geeni. Follow the app name or QR code printed in your camera’s manual, packaging, or model-specific support information.
How do I reset my Merkury Smart WiFi Camera?
Power on the camera and hold its reset button, or press the recessed reset hole with a pin, until you hear a tone. Release it and wait for the pairing indicator to begin blinking.
Why won’t my Merkury camera scan the QR code?
Increase the phone’s brightness, clean the lens and screen, remove glare, and hold the code about 6–8 inches away. Move it slowly or use WiFi Mode if your app offers that alternative.